
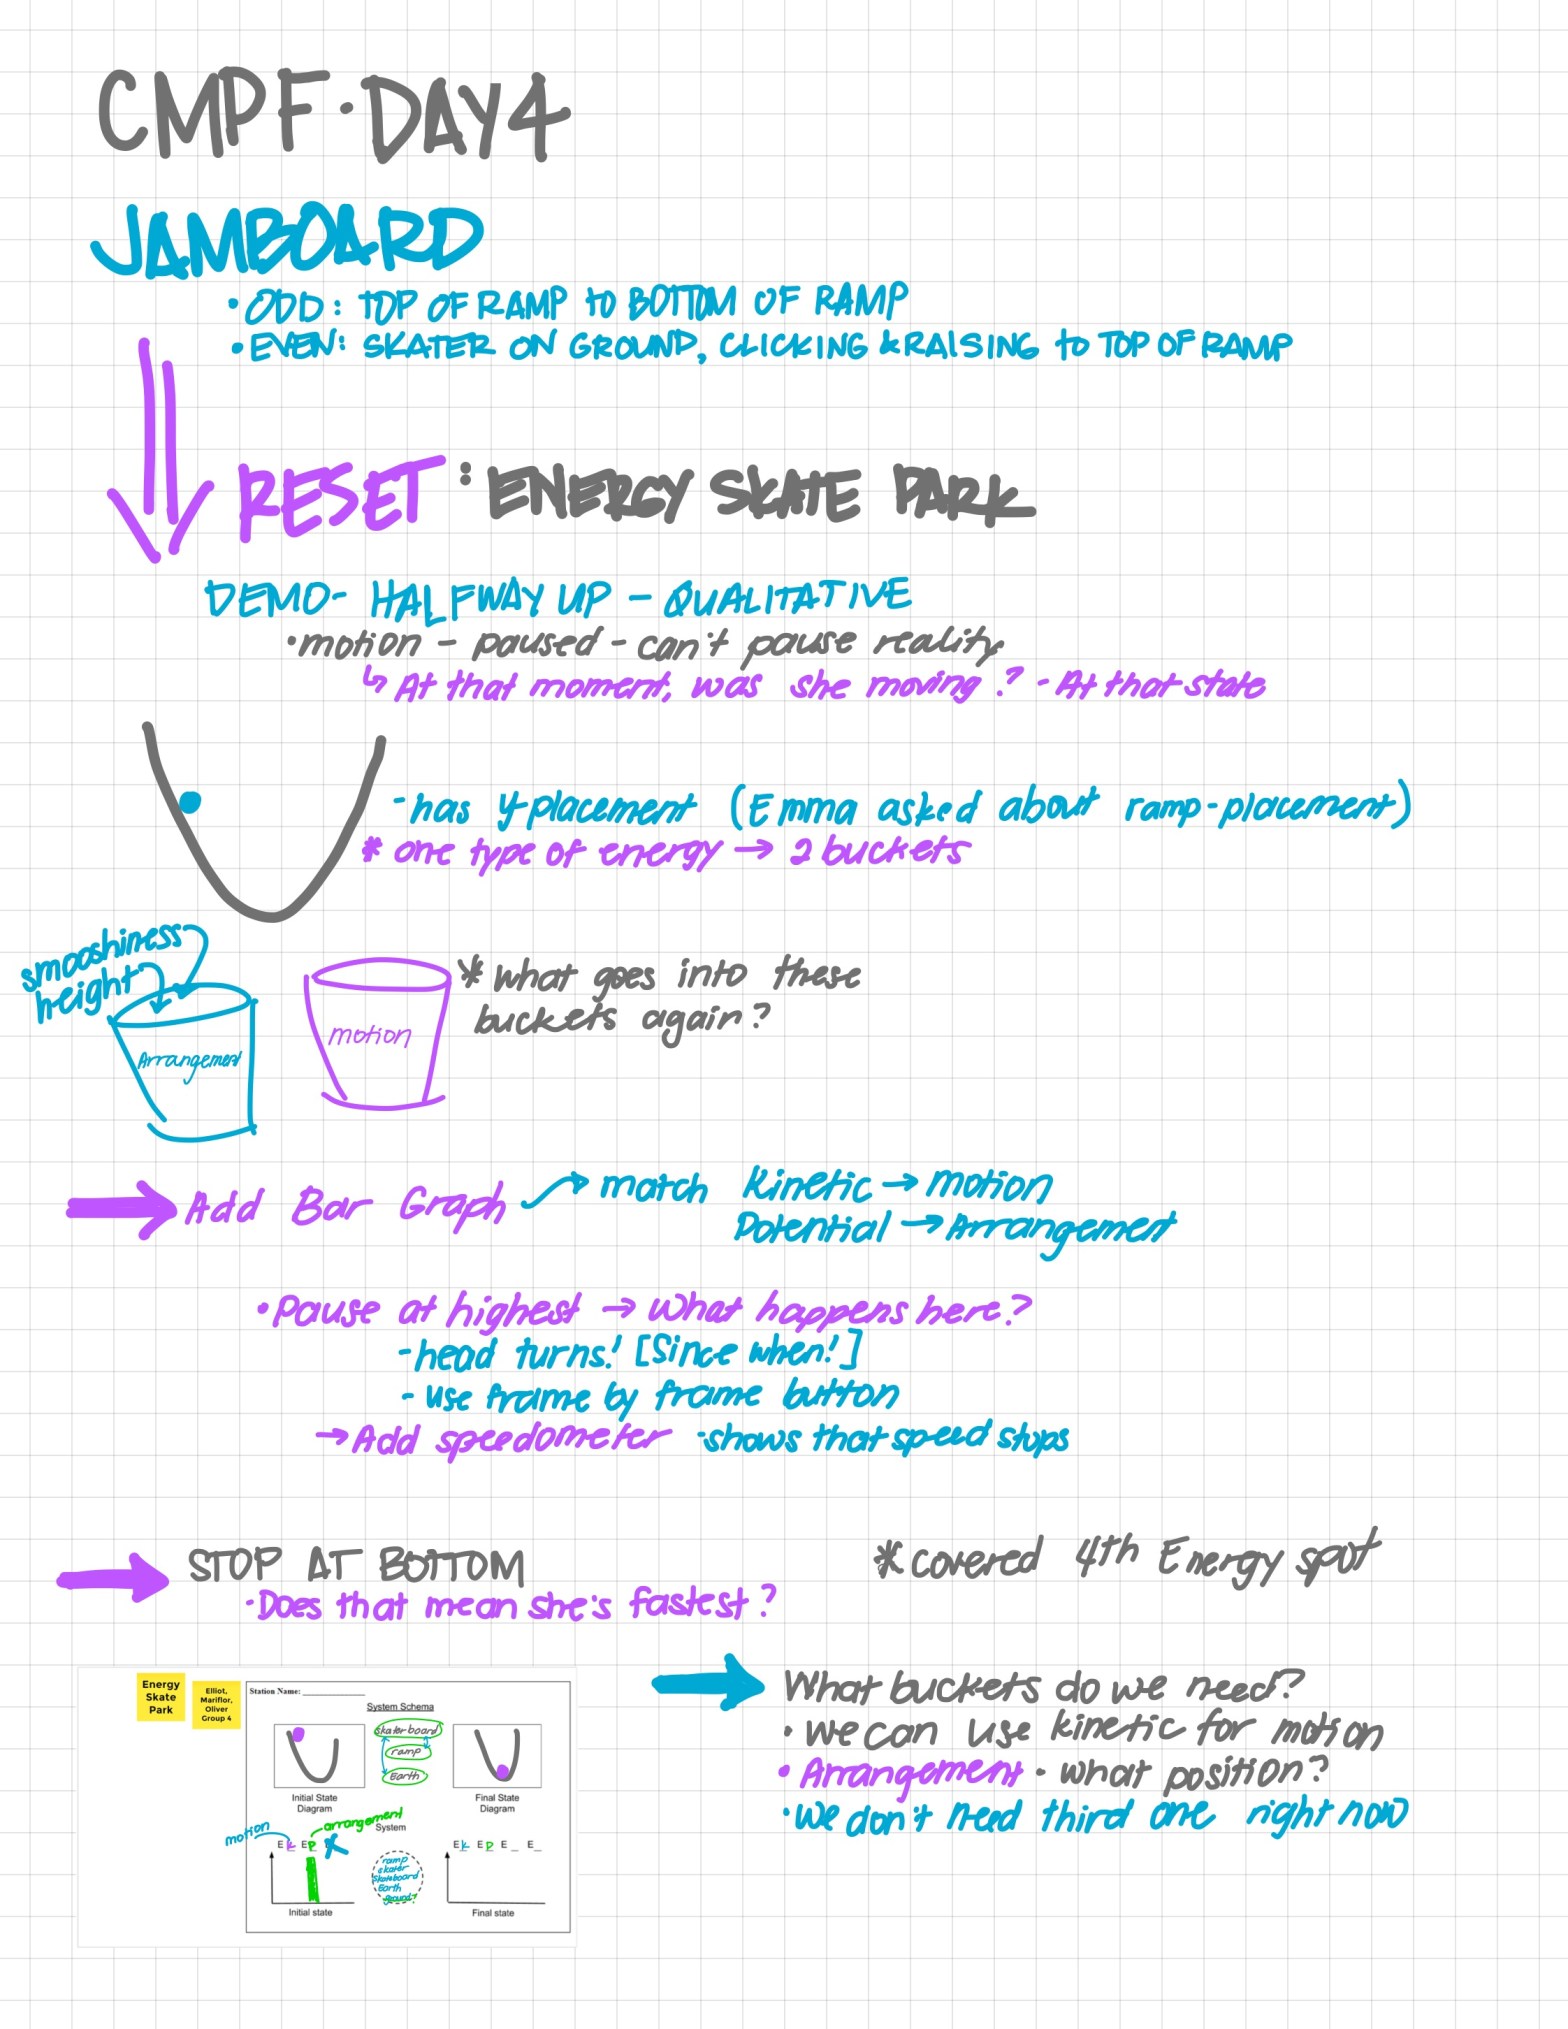
I’m not used to coming into my next session with questions. I like to feel confident that I understood completely what happened the day before, but I need to sit with that (and remember that I will have students feeling this way). We do start our day off with a Jamboard of creating a system schema for the Energy Skate Park sim. A couple things I found out today.
- The head of the skater turns as it switches directions. How many years have I been using this same simulation, and I have never noticed it? I am grateful for my more perceptive colleagues.
- Using the frame by frame button gets the skater to where we could talk about them ideally…and not just theoretically. I will need to utilize this button when doing the class demos.
- Referring to the types of energies as “buckets” was easy for me to digest and illustrate. I can clearly see the characteristics that would go in there.
- I still don’t understand Energy.
I appreciate the way that the discussion was laid out this morning. It made me get a clearer picture of how to lead this same discussion for when I actually do it in class. Some questions I was left with was when do I bring in thermal energy? Do I call it dissipated? (I think as I write this, my answer is to not call it dissipated.) I think someone in the group asked about the interaction between the wheels and the ramp. After a bit of the discussion going in a different direction, it was strongly suggested NOT to add friction just yet. After going through this whole thing in student mode, I can see why. I guess my question is– When do we add friction?


Soon after we discussed the sim, we created a Unit 1 Model. I liked the way we had to do it because it forced students to connect things together. Last couple of years, I gave students and end of the unit reflection with different thought bubbles and arrows, hoping that they’d utilize the shapes and turn it into a beautiful piece of understanding art. However, what ended up happening was that they asked for an example and then just copied what I wrote. Doing this on a Jamboard would allow that flow and creativity (and groupwork) to happen.
Unit 2 Begins with Buggy Lab!
For the first three years I taught Physics, I did the prelab so very wrong. I forgot to give the buggy to the students so that they could actually do what I asked them. Every year, a brave soul would ask me if they can get the buggy so that they can take measurements…but I asked them to do the impossible instead. Crossing my fingers that I do it right this year!
The question Melissa posed: Does the car move and how do you know? We, the students, gave a variety of answers that proved how we know the car was moving. Then we went into Breakout Groups and were asked to draw a series of state diagrams of the car moving. Our group was a bit overachieving and drew 9 states. When other groups shared, they drew 4. We then had the discussion of what changed? I’m very grateful that our modeling leaders are such phenomenal people and were brilliant in how they moved our discussion from a state of confusion towards more understand. I took some notes, but I was so engrossed in the stories! I hope Kristy and Kim took better notes than I did. The next part is actually taking data using Pivot. Some of the leading questions that I wrote down because I wanted to make sure I remembered it and used it in my class:
- How did you come up with these numbers?
- What do think tick 14 will be? (Predict after the predictions)
- How do you get the next position based on the one before it?
ALL BRILLIANT because then it lead us into Pyret. We didn’t even really talk about math formulae or the linear equation (yet…). We looked at it as “last position plus 16” or “last position minus 8”. This is where I wrote down multiple times: Review Pyret skills. In our side text conversation, we were slightly freaking out about how much information will the students retain? How much time has elapsed since the would have last coded in Pyret? I guess this means that they will need to practice Pyret skills a little bit each day! Mental note…build that into our lesson plans.
The super awesome Team Pixar ended our discussion while filling out the Design Recipe. We initially had written down position 1 & 2’s values plus 16. Then Elliot brought up a point that if someone decided that the buggy’s position was at 1, then our formula would be no good. So then I can’t remember if it was Elliot or Oliver, but they brought up: “For every 1 tick, go up 16 cm” This was important as we normally have the students complete some sort of exercise about rates, ratios, and unit ratios. I feel like we had to build up their vocabulary so that the students would be able to say: For every 1 tick, …


