It’s Day 1 of the Modeling Chemistry Workshop here at the birthplace of the Modeling Instruction pedagogy! I am very excited to be on this journey. I’m going to complain once about the weather, and that’s it (I hope). We left San Francisco and it was maybe 67℉. It is a cool 103℉ here in Tempe, Arizona. My poor daughter is looking at me wondering if this is going to be our life now. We will appreciate the “hot” Bay Area weather when we get back!
I forgot what it was like to be a participant in a modeling workshop! I forgot the feeling of drinking from the firehose (and how much I actually do enjoy it).
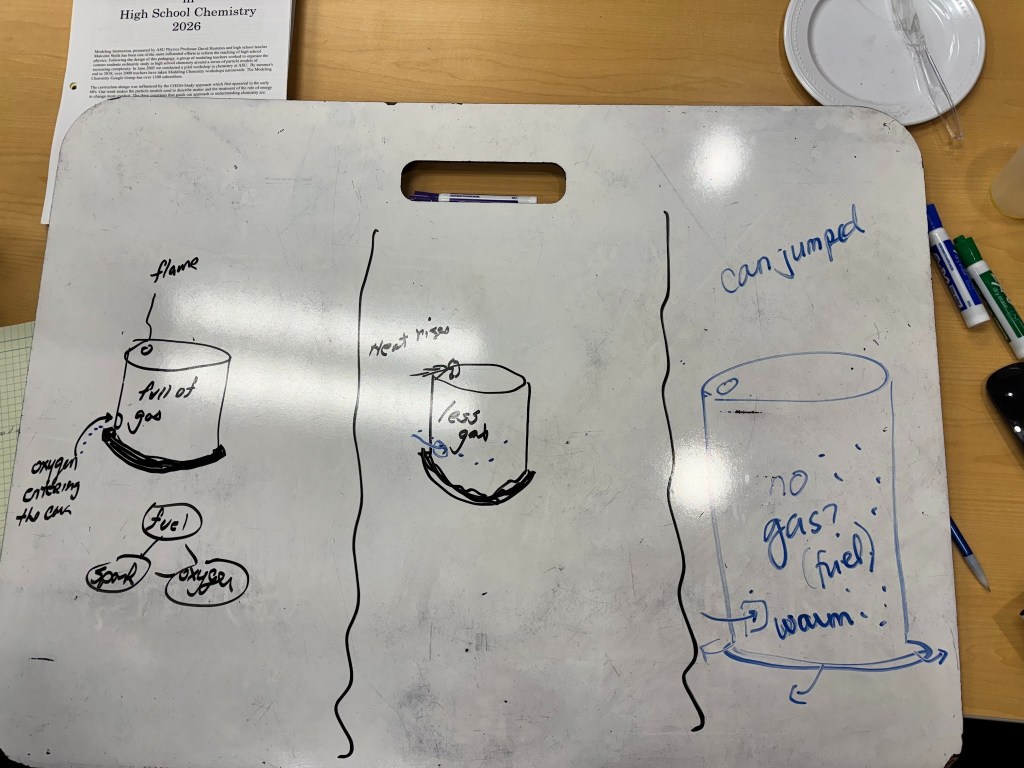
Day 1: Let’s not be shy about blowing things up! I’m most nervous about 1) doing this demo 2) guiding the conversation. As long as Mitch and Jae keep making the objective of the Board Meetings clear, then I can figure out how to guide the class toward the takeaway. My partner had some questions about my representation of oxygen. I’m wondering how my students might represent oxygen in this case. I liked the question Mitch posed that would steer the conversation: How can we represent things that we can’t see?
Once he asked that, it was suddenly more clear how this would be the beginning of the development of the model.

Day 2: Mass Change
I really like how this lab already had students collecting quantitative data and that the class would share their data on a shared table. I think I might do something similar, but put it on a document since there is limited board space in 206. I wish I took a picture of everyone’s board representations. There were some representations of the burned steel wool where there was an entirely different particle, represented by a different marker color. My group drew this by adding a new particle to our drawing of the stretched out steel wool.
I cannot remember why having the particulate model of changing it entirely would not be advised. For me, I figure it’s because the previous substances would be completely removed thus breaking our Conservation of Mass point. I hope it’s that?
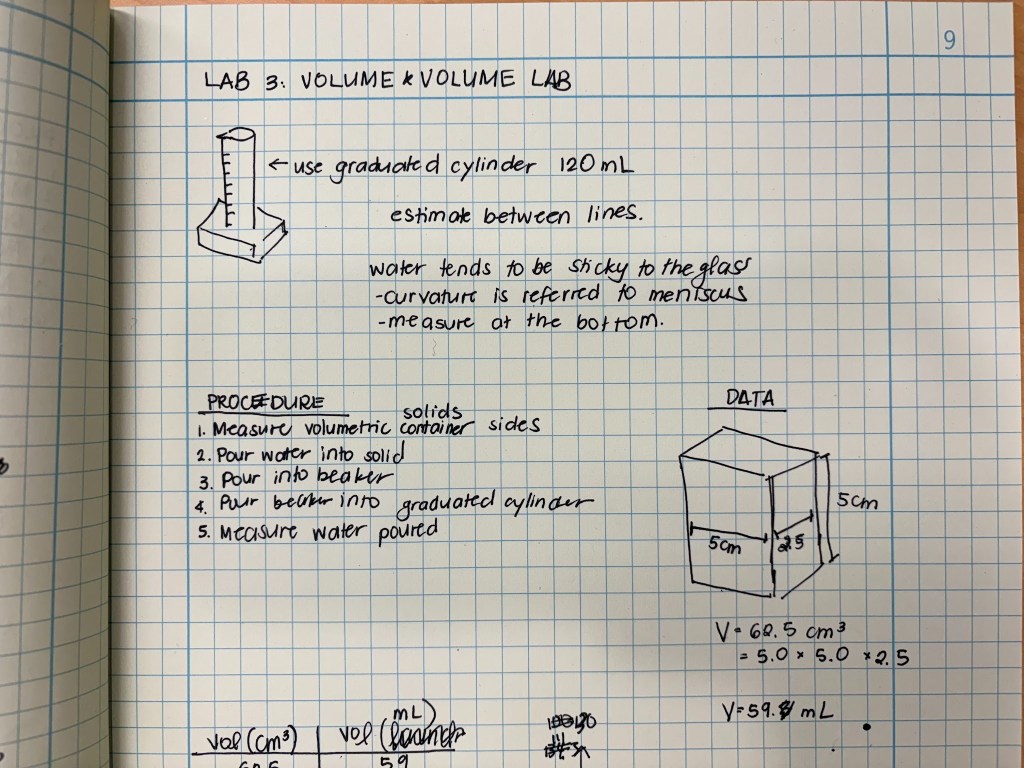
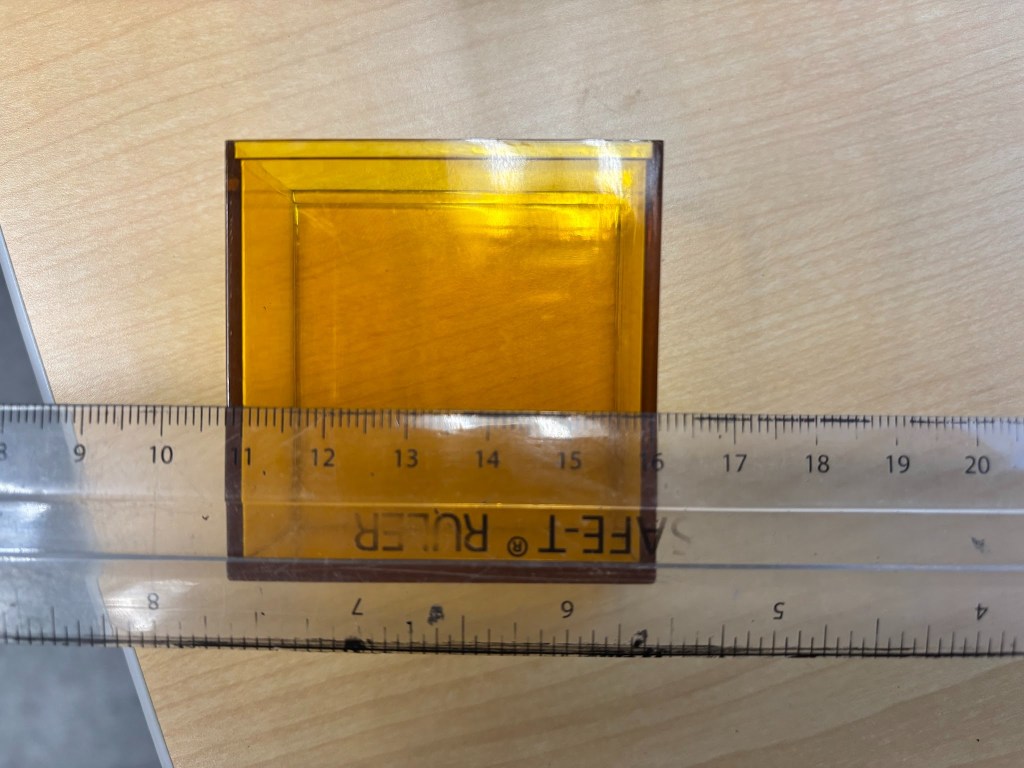
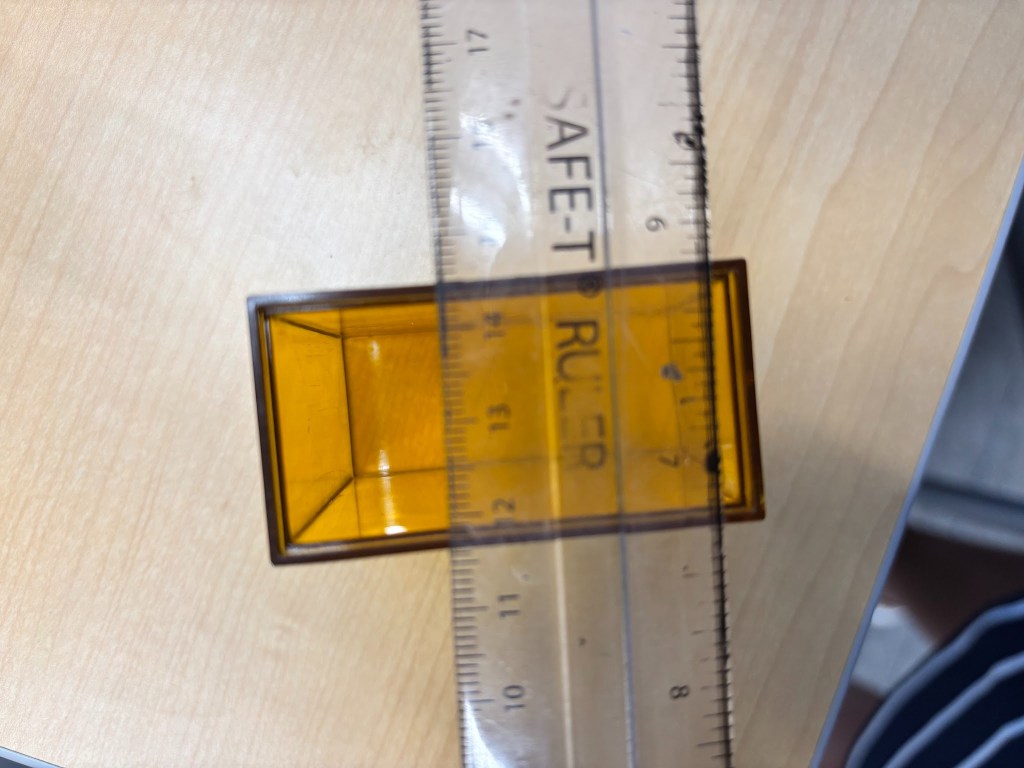
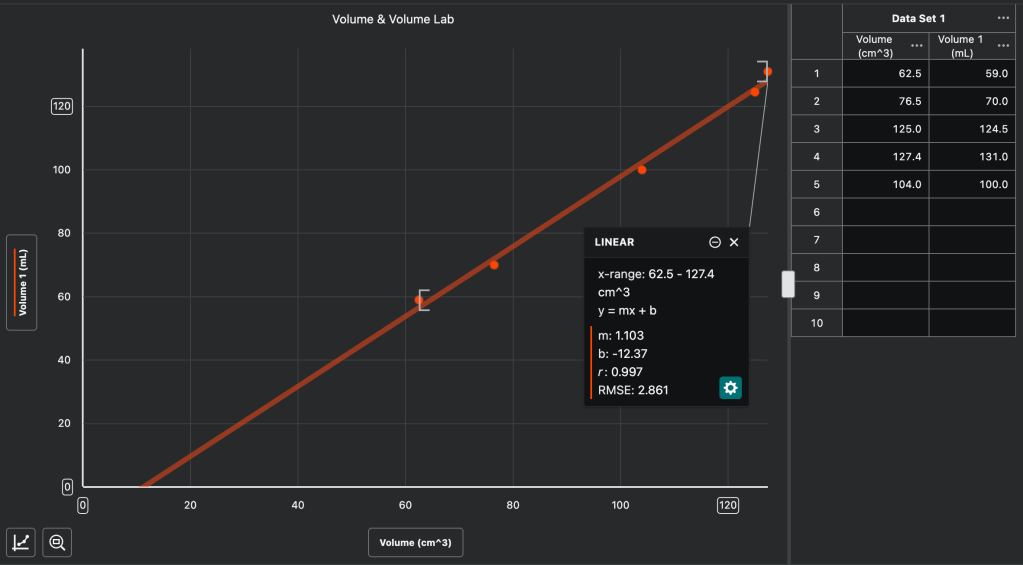
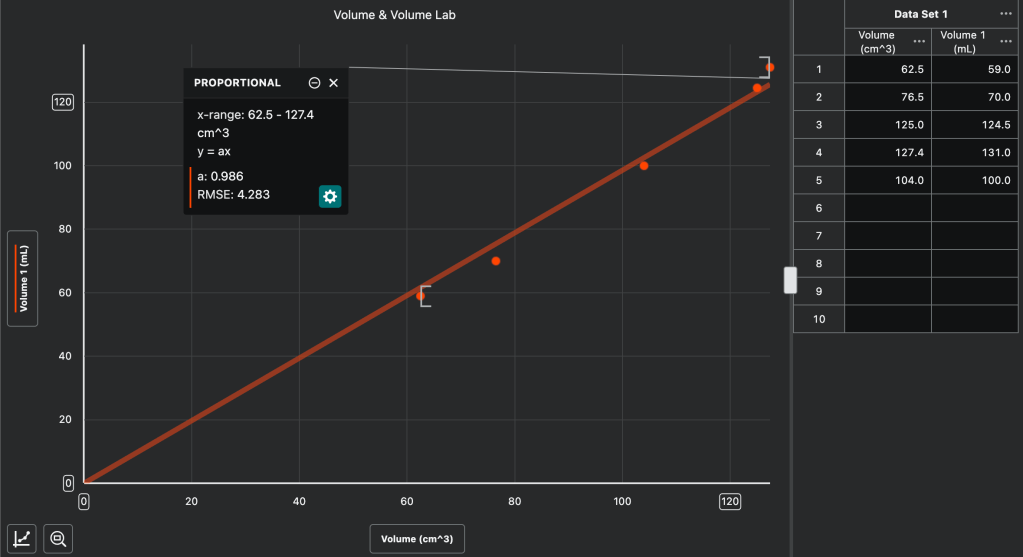
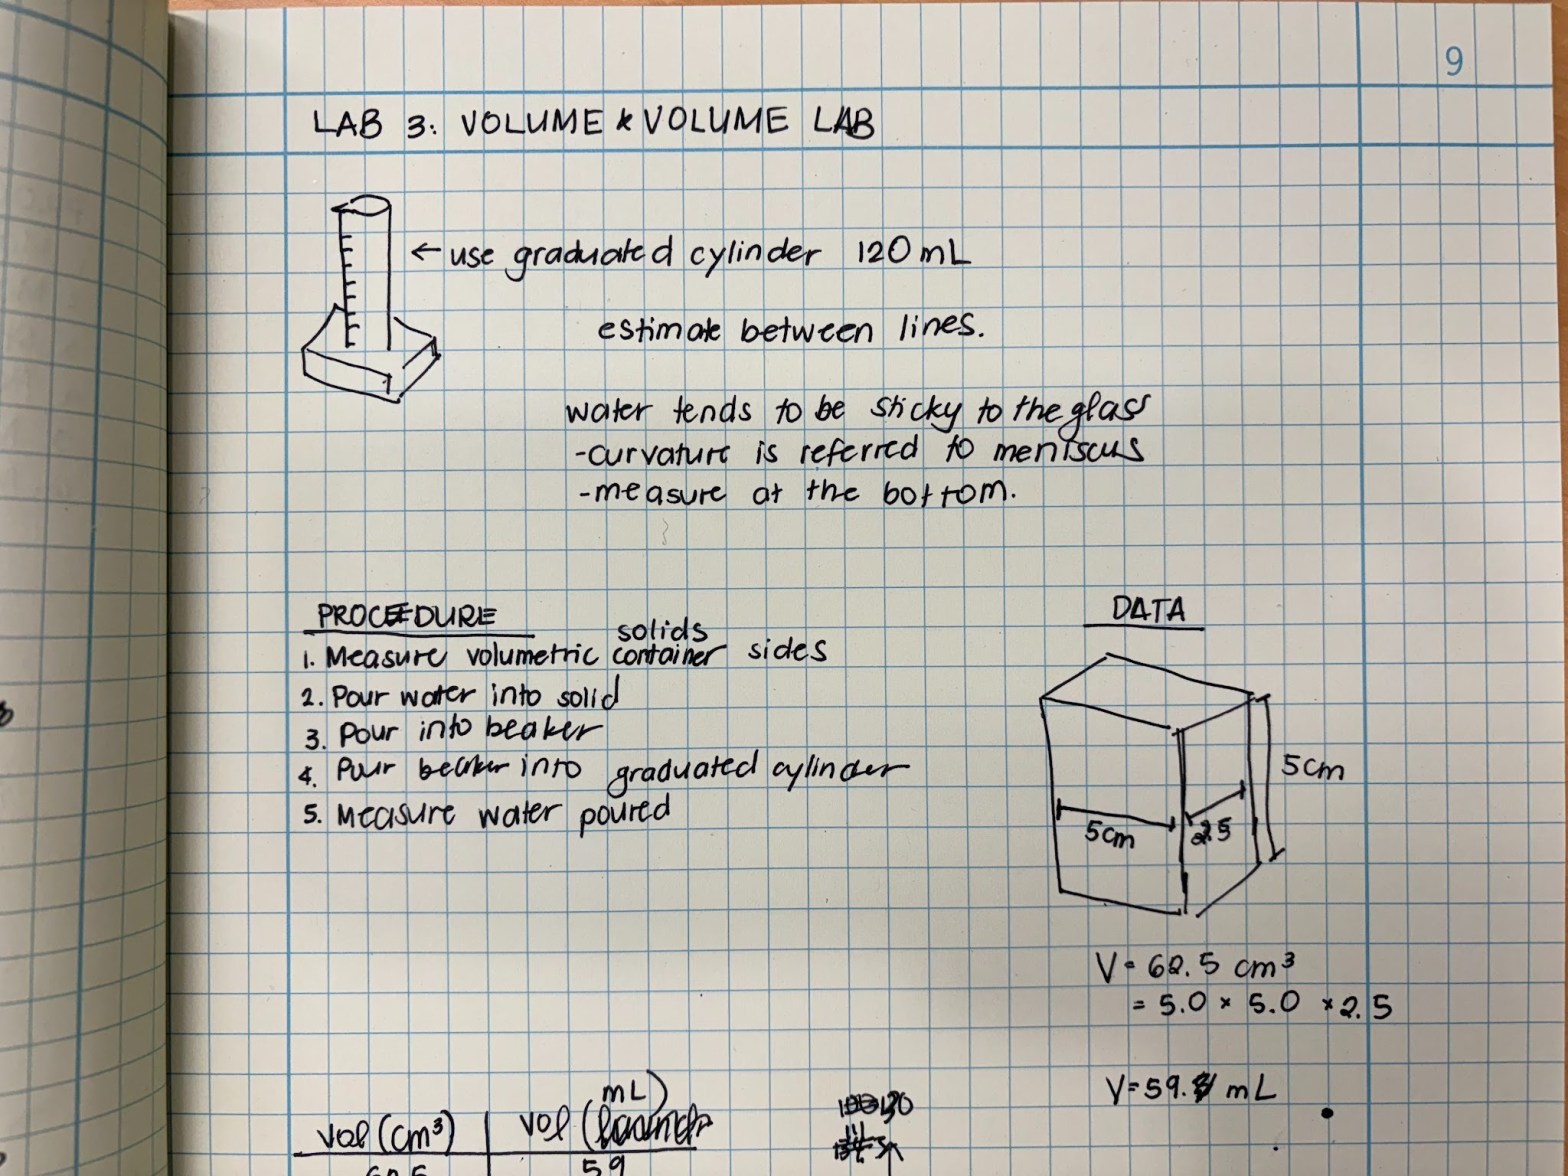
Day 3?: Volume & Volume lab- the development of the concept that cm3 = mL. Last year, students did not get the physical experience of seeing that cubic centimeters does translate to milliliters. We kind of just told them in our Density lab. I like this idea of students experiencing this truth for themselves. This also introduces the concepts of error analysis that doesn’t necessarily need to be “human error”…which is what I always seem to see in lab reports. In this case, our choice of material and substance (water) contributed to the values being slightly off.